Today, the majority of girls when creating hairstyles began to actively use braid. Applying various weaving schemes and accessories, it became possible to create a charming image suitable for every day or for a celebration. At the same time it is not necessary to have thick and long hair.
Stylists were able to develop weaving options, with the help of which they manage to create a stylish hairstyle for short and sparse hair. It will look very impressive braid with woven ribbon. If you choose it for your outfit, the image will be very harmonious and attractive.
From 3 strands
This option is the creation of hairstyles is considered the easiest and fastest. Having prepared the tape, you will need to fasten it near the base and use it as a separate strand. 
The procedure is as follows:
- Carefully comb hair, moisten it slightly and apply a modeling product. If the hair is thin and not obedient, it can be treated with wax-weighting agent.
- In the area of the crown, select the strand. Create a tail under it and fasten a ribbon on it.
- From the selected strand create a loop that will be directed to the left. To be comfortable to hold it, it is necessary to secure the crab barrette. The tape will be concentrated on the right side of the head.
- Lay the accessory on the loop and tightly wind it around the strands. Haste in this matter is not welcome, otherwise the strand washes disheveled.
- Now it is worth performing a pickup from the free mass of hair on the right and create a new loop.
- Again, lay the tape on top of the loop and wind it.
And here is how the waterfall braid braid looks like on the photo, you can look at the video in this article.
 For those who want to learn how to learn how to braid the braids themselves, you should watch the video in this article.
How beautiful braids for a wedding with medium hair look like and how good they look can be understood by looking at the content of this article.
But how wedding hairstyles are made for long hair with a scythe and how good they look is indicated here: http://opricheske.com/pricheski/p-prazdnichny/svadebnye-na-dlinnye-volosy-s-fatoj.html
How to properly make a wedding hairstyle braids for long hair, will help to understand the information and photos in this article.
On video weaving of a braid with a tape from 3 strands:
Do similar actions until the hair runs out. In the course of weaving, the loops must be pulled towards each other in order to get a more delicate pattern. And although this hairstyle is simple in terms of performance, it looks very attractive and can serve as an excellent complement for office or evening appearance.
From 4 strands
A braid of 4 strands with a ribbon will look very elegant. Hair will be able to decorate any girl who is going to work or to a party.
In the photo - 4-strand braid:

And you can create it as follows:
- Go through the hair comb, divide the hair into 4 equal sections. To the first left to tie a decorative element.
- The leftmost part is separated and skipped under the two adjacent strands and on top of the second one. Thus, the first strand will become the second.
- Pass the extreme strand on the right under the two adjacent ones and lay on top of the second one.
- Now add the hair from the free left side to the last strand on the left and skip the second one under the two adjacent ones and on top. Similarly done with strands on the right side.
- Adhering to this scheme, it is necessary to gradually add strands from two sides, until all the hair is involved in the process.
What hairstyles from braids for long hair are the most popular, you can look at the photos in this article.
On the video - weaving a braid with a ribbon of 4 strands:
5 strands
This method of weaving is very similar to that used to create a French braid. However, it is a bit complicated, as it combines pickup and shahmatka. To create a hairstyle you need to buy a wide ribbon. But what looks like a haircut with oblique bangs on medium hair, can be seen in the photo in the article.
The process of creating hairstyles is as follows:
- Weaving should originate from the top. Highlight a strand of hair using a sharp comb. Lift it up, secure with a tight clamp.
- Minimize the decorative element in half and fix to the head using stealth.
- Remove the clip from the hair and lower the hair down so that the place for fixing the tape is not visible.
- Divide hair into 3 equal sections - 2 strands of hair, 2 ribbons and 1 strand.
- Each extreme lay on the other in a checkerboard pattern. Perform the process of weaving in a mirror image on both sides.
- When the first binding is completed, the hair will be drawn from the free mass into the process.
- Continue weaving by analogy with the French braid. If you observe everything correctly, you will get a fashionable braid of 5 strands with ribbons. If you need to give volume to a spit, then you can achieve it if you pull your fingers over the loops.
On the video - weaving a braid with a ribbon of 5 strands:
Two braids with ribbons
You can make two pigtails with ribbons. This hairstyle looks very nice and fashionable, and you can use it not only for adult girls, but also for children in school or kindergarten. To do this, divide the hair into two partings. Take the right part of the hair, divided into two equal sections, put a ribbon between them. Perform weaving conventional braids, cycling the tape instead of one order. At the end, fasten the braid with a thin cut. Similar actions to do with the other part of the hair. Thus, you can create braids using various weaving techniques.
What hairstyles for medium hair with braid weaving are used most often and how well they look, is indicated here in the article.
On the video - weaving 2 braids with ribbon:
French spit
This hairstyle is considered very elegant and beautiful. It will be a great addition to the festive look. Do not think that it is difficult in terms of performance. Make a hair under the power of any girl, but first you need to have a little practice. Spit with the flight can be woven both vertically and on one side. 
The process of its creation is as follows:
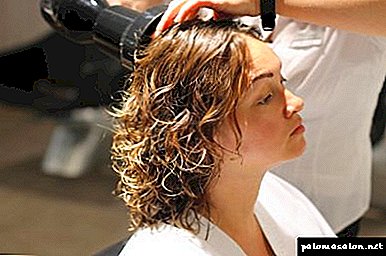
- First you need to prepare the hair. Wash them thoroughly and apply conditioner. Its role is to facilitate the combing process. Now, with the help of a hair dryer, thoroughly dry the strands.
- In the area of the head to highlight the main strand. On it to fix the tape. To do this, you need to use invisible hairpins. To give the styling a special charm, you can use a wide openwork ribbon.
- Divide the hair into 4 equal sections to start weaving. Technique similar to the French braid, just do not forget to thread the decorative element through the strands.
- When you reach the bottom, then the tail should be secured with a thin elastic band. You can wrap it with a tape that was used during weaving. This hairstyle will look very original.
- Ready laying should be fixed with varnish so that it does not break up throughout the day. If there are hairs sticking out on the sides, then they should not be removed. The presence of a little mess will allow you to create a cute and original image.
As the scheme of weaving hairstyle French waterfall occurs in stages, you can see the video in this article.
On the video - weaving braids with ribbon, step by step instruction:
Tangle is a technique that never goes out of style. It is very often used to create wedding, prom and daily hairstyles. You can decorate the braids in different ways, then it looks the most effective with an interwoven ribbon. The width and color of the ribbon should be chosen according to the structure of the hair and the color of your outfit. All the above schemes of weaving are not complicated, as you can safely create a hair at home, if you practice a little.
Ribbon weaving in a braid: what you need to prepare
In order to begin to weave the ribbon into a braid, you need to prepare the tools that can be found in any woman’s cosmetics bag.
- Comfortable comb that will not tangle strands of hair
- small hair ties
- multicolored ribbons
- invisible.
You can use not only ribbons for the braid, but also various scarves, strips of fabric, as well as pebbles, hairpins, which will help improve the image, make it romantic and mysterious. The color of the ribbon used for the braid may be different, but it would be better to look at the ribbon, the color of which will be harmoniously combined with clothes or other accessories.
Ways to weave a ribbon into a braid
There are several ways to weave the ribbon into braids, which ideally emphasize the image and style of a woman. Owners of long or medium hair should definitely try one of the ways that are not complicated at all, but take time, especially when such a hairstyle was not created before.
Method 1. Perhaps the most simple way is considered to weave a ribbon into a regular braid. Prepare the ribbon in advance: if the braid is tied with a ribbon bow, then it should be much longer than the hair itself. In cases where the ends of the tape will be hidden in a braid, then it should be twice the length of the hair.
Comb your hair well. Collect the hair in the tail and tie a thin elastic band. You can make the tail both on the crown and the back of your head or on the side. Take the ribbon and wrap the elastic around it, tying the knot over it. Both ends of the tape should be the same.
Then divide the tail into three even parts. Attach the ribbon to the two extreme parts of the strands, and begin to weave a regular braid. In the end, you can tie a bow with ribbon edges or hide them inside the braid. Owners of long hair often pick up such a braid and make a knot around the head, pinning hair with invisible hair.
 Weaving a ribbon into a three-strand braid
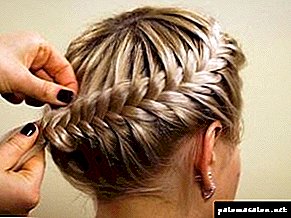
Method 2 The hairstyle with two braids with ribbons that you need to twist on the back of your head will look beautiful. These hairstyles are often worn by our mothers in school. Previously used ribbons of dull colors, but among the modern selection of ribbons, the hairstyle will become bright and beautiful and much more modern.
 Weaving tape into two braids
Method 3. The tape can and not fly into the braid, but simply to decorate her already finished hair.
How to weave a French braid with a ribbon
A good option would be a French braid with a ribbon. There are several options for this hairstyle, which are ideal for a casual day, so evening or wedding hairstyle. The advantage of the French braid is that it is quite simple to make it, but you still need to practice a little. Braid French braid can be as follows.
 French braid - one of the options
- Comb your hair well. Apply a fixative that will help the hair, keep as long as possible.
- Split the hair in a horizontal parting, select two parts (the front strand is divided into three even strands, one of which is a ribbon).
- Take small strands of hair, but the same size.
- In a familiar way, begin to intertwine the strands between each other.
- Hold one strand with your left hand, and take the right strand with your right hand and join them together (with your right), and then intertwine with the central strand. The right strand must necessarily be on top of the center. Thus, all the following strands will pass over.
- Then do the procedure the other way around: a strand of the right hand seizes the strand on the left side and connect with each other.
- Thus, take new strands and intertwine with each other to the very tips. At the end of the ribbon can be tied with a bow or hide inside.
- It is important to ensure that all the strands were the same size, only then the hair will turn out beautiful and neat. We recommend watching the video: “How to weave a French braid”.
Having mastered a simple version of the French braid with a ribbon, you can try other options, each of which requires training, but for a woman who wants to have a beautiful view, nothing is impossible. At the end of weaving, hair can be fixed with hairspray.
Tips for weaving a ribbon in a braid
It is not at all difficult to weave a ribbon into a braid, and it is not difficult to achieve the desired result without a few workouts. It is also important to follow a few simple rules and tips that will help you master the technique faster.
 The ribbon is woven into the braid - stylish and original.
- Try to practice weaving the ribbon into a plait on a girlfriend with long hair.
- Before creating the hair, be sure to comb your hair well and apply fixing agent on it.
- Do your hair only on clean hair.
- Before weaving the braid, prepare all the necessary rubber bands, invisible.
- Your chosen tape should be twice as long as your hair.
- Choose ribbon better from organza, silk.
- Together with the ribbon, try using other hair adornments: beads, barrettes, live or artificial flowers.
- Ribbon color should be combined with outfit or other clothing accessories.
- In the process of weaving, take equal strands of hair, so the hair will be neat and beautiful.
Having trained a few times, you will definitely be able to create a beautiful haircut with a ribbon in a braid. Weave braid with ribbon can be both adult women and adult women. The main thing is to fantasize and practice more, then you will definitely become a master, and you can easily come up with new options and improve your image.
Materials and tools you need
Weaving a braid with a ribbon begins with the preparation of the necessary equipment that will help make your hair neat. These braids do not require any special tools: usually everything you need can be easily found in any female cosmetics bag.
 Comb as an important accessory for creating braids
So, to create hairstyles using ribbons woven into a braid, you will need:
- hairbrush,
- hair ties (it is better to use colorless silicone),
- braid
- invisible.
This is the minimum set of necessary equipment. Perhaps, in addition to creating the image, you will need hairpins, hair stones, etc.
How to weave a ribbon into a braid
It should be noted that there are two main options for weaving braids with ribbon. Conventionally, all hairstyles using braid can be divided into those that are woven at once with its inclusion, and those that are decorated with it.
 Plain ribbon braid
The first method is step by step
For this option, select the braid, taking into account its length and the possible reserve for the bow, if any. In any case, the minimum length of the braid is twice the length of the hair. We start the hair with combing and gathering curls in the tail. Place it anywhere (at the back of the head, crown, side). Weaving a ribbon into a braid begins with its fastening at the base of the tail by winding around the elastic. The ends of the braid should be the same on both sides. Next comes the standard braid weaving, where ribbons are applied to the two parts of the hair. The result is a simple, but at the same time spectacular hairstyle.
You can braid the braid with a ribbon in another way, using the same technique for this, but dividing the tail not into three parts, but into two. It is the ends of the braid, which is attached to the tail, here will act as the third strand. Next is the standard weaving. This braid will look spectacular and unusual.
Second method
You can weave the ribbon in a braid, already creating weaving. As one of the options - the separation of hair into two parts and the formation of "spikelets" or "dragons" on two sides of the head. After, in already ready weaving, the band is added. As a result, a ribbon lacing appears on the head, which connects the two braids.
 Ribbon lacing that connects the two braids
Creating each of them for the first time, it may be difficult to achieve the desired effect from the first time. But having trained, it will be easier and easier to do it.
French weaving scheme and master class
French ribbon braid is a special charm. This hairstyle is difficult to call everyday, so it is often used for special celebrations.
 Spit of four strands with ribbon
But, despite all its solemnity, the French braid is not complicated in its technique, and its weaving can be easily learned. Below is a diagram of weaving a braid with a ribbon in the French manner.
- Combing curls. Hair should be washed and dried.
- With the help of two small Invisibles, we attach the braid to the hair. To do this, separate the hair at the crown as with the standard weaving of the French braid. Braid fastened under the hair.
- At the top of the hair are divided into 4 strands. It is very important to remember their numbering, as this will facilitate the process. And you can easily make a braid of 4 strands with a ribbon.
- The first strand is placed under the second, and this action is constantly repeated with neighboring strands.
- The first strand is on top of the braid.
- The right one lies over the nearest right tuft of hair.
- The right strand is twisted from left to right.
- These actions are repeated alternately on both sides, adding hair at the edges.
Weaving a French braid with a braid, it is very important that the strands are the same volume, then the hairstyle will be neat
 Weaving a French article
Having trained several times, you will surely master the technique of weaving braids with ribbon and will always look beautiful, fashionable and stylish.
4 strand version
How to weave a ribbon into a braid? There is an interesting way. At first glance, it is difficult, but the process is fascinating. The weave is very relaxing, and the resulting hairstyle raises the mood doubly. Here is an interesting step by step option:
- good to comb strands. In the frontal part to separate a small area. Gently attach a tape or a piece of thin fabric to the strands,
- the selected area is divided into three parts. The ribbon should be in the center. It is advisable to memorize parts or even designate them.
- start braiding the braid in the usual way. The ribbon in this case is passed between the strands of hair,
- 1 and 2 sections are taken with the left hand. The tape is placed on section 2. At the same time the right hand should support 3 sections,
- 3 plot is put on 2. Between them, the tape is skipped. As a result, the right hand should hold 2 sections and cloth. Last should go to the 3rd section. Then 1 strand is placed on the tape under section 3,
- 2 strand is placed on 1. This adds a bit of loose hair on the right side. The tape is put on section 2. As a result, the fabric and 1 section are in the right hand,
- 3 plot starts up under 2. Now take free locks on the left,
- 1 section is placed on 3. In this area you need to add a little hair on the right and again put the tape,
- 2 is fed under 1. Hair is added from the temple. They come from the left,
- thus continue step by step weaving.
In the end, an unusual pigtail with a ribbon will appear, the right side of which will be inside and the left part will slightly protrude. To make it more voluminous, it is recommended to pull out a few hairs and slightly tousle your hair. We'll have to work hard, but the result will definitely please. With this hairstyle you can go to school, and you can attend a party.
3 strand option
It looks interesting and weaving. Instructions.
1. Comb the hair and divide into 3 parts.
2. Tie between 2 and 3 pieces of cloth.
3. The first section is laid behind the second one, is passed under the fabric and put on 3.
4. Fabric hold under the central section and return to its original position (paragraph 2).
5. Thus carry out the remaining operations. The resulting braid should be slightly weakened.
It turns out an unusual variation of standard weaving. Hairstyle will appeal to those who have already managed to get bored with the French braid.
It is not necessary to simply weave a long pigtail. The resulting weaving with a ribbon can be neatly laid on the head or make a cute bundle. To complete the image will help the flower of the same fabric.
What hairstyle to choose? Thin and spongy curls perfect French braid. It creates the effect of density and makes hair bulky.
At fashion shows popular braid rim. It will be interesting to look in everyday life. The selected piece of fabric is gently woven, and then the whole structure is placed around the head.
Many depend on the tape itself. It is not necessary to purchase it, you can simply take a long piece of thin material. Satin, chiffon, fine felt will work well. You can take a small strip of velvet. At the same time the fabric should not be too tight and confused hair.
You can take the old chiffon scarf and use it. Get an unusual, gentle way. But you need to know - the tape should be combined with a dress or contrast with it. If the dress code allows, you can go to work with weaving, decorated with black satin fabric. It does not attract much attention, but it looks stern and stylish.
On the beach or disco you can dress up and make a beautiful haircut. In this case, the fabric in the hair can be decorated with a print.
No need to make weaving tight: the beauty of it is in the pomp of hair.
Easy version of pigtails with ribbon
It is better to start with something simple, such as a single-strand pigtail with a ribbon. By following the steps below, you can easily braid the first ribbon masterpiece.
- Well-combed hair can be slightly moistened with water and treated with a modeling agent. For thin and not obedient hair, you can use a wax-weighting agent.
- On the top we select one large strand. Under it we make a small tail and fix the ribbon on it.
- From the selected strand we form an elegant loop looking to the left. For convenience, we hold it with a crab barrette. The decorative element is located on the right side.
- Put the ribbon on the loop of the hair and tightly wrap it around the strands. Hurry here is not worth it, the strand should not be tousled.
- The next step is to pick up from the free hair on the right side and make another loop.
- Again, put the decorative element on top of the loop and wind it.
Further, when weaving, it is well to tighten the loops to each other, so a more delicate pattern will be created. Despite the simplicity of execution, this braid will serve as a chic addition to an office and evening look. The interweaving of a decorative element can lead to such an extravagant result.

The so-called spit of "bubbles" looks very voluminous on any hair. Can be performed on the classic horse tail. It’s easy to weave in this way. The execution scheme looks like this.

Ribbons are highlighted in pink. The extreme left is working, and we begin to weave with it. She will create the whole pattern of braids.
In the usual three-spit braid, you can weave a ribbon and the result will be a completely non-trivial version. The scheme proposed below explains everything step by step.

- The first strand comes under the second, the third, which is a ribbon.
- The fourth strand we start over the near, under the third.
- To the second strand we are making a subtitle, we get it under the fourth and the third.
- To the first strand we make a podlet, we get it on the second and under the third. We drag to the end of the hair.
Weave braids with multiple ribbons
After mastering a simple braid weaving scheme, you can begin to complicate and weave two ribbons. You can braid the braid of four strands just from the hair, without the use of decorative elements. Step by step weaving pigtails with ribbons is as follows
- We take two strands of hair and two ribbons. It turns out the alternation of strand-1l-strand-2l.
- We begin to weave with the leftmost strand, which we place under 1l, on a strand of hair and under 2l.
- Now 1l became extreme left. We get 1 l under a lock and on 2 l. Make a podlet on the right to the rightmost strand of hair. The tape goes further under this right strand.
- We take the leftmost strand, add loose hair to it and start the strand under 1l, onto the strand and under 2n. Next, continue to weave, repeating step 3 and 4.
For easier perception there is a scheme of such a scythe.

Braid the braid of the five strands, where the two strands are tapes, will help the scheme and instruction, where step by step everything is painted.
- Separate the three strands on the top and below them fix two ribbons (1l-pale pink, 2n - bright pink).
- Weave start the leftmost strand. We put it under the near strand, on 1l and under 2n.
- Now take the rightmost strand. We get it under the near, on 2 l and under 1 l.
- Again, take the leftmost strand, we get it under the near and add to it a small strand of loose hair. Next to 1L and under 2L.
- Repeat step 4 on the right side. Continue until the end of the hair. The result will be a charming pigtail with a ribbon.
A truly masterpiece can be called braids, braided from six or more strands. But nobody can do this task on their own. Only professionals can handle this creation.

Weaving braids with tape process is laborious and time consuming. The resulting hairstyles can be in the form of braid rim, and the French braid, and "fish tail." Weave into this hairstyle can not only tape. Be patient, train, and the result will not take long. Experiment!
To whom and for what cases is suitable
This hairstyle is suitable for both schoolgirls and adult women. Age limits may apply only to used accessories. Looks great on long strands. No less interesting looks on the hair with highlighting. It is carried out simply, which makes it possible to quickly master the technique and fantasize with variations.
Hairstyle you can safely choose creative people who are supportive of the bohemian style. Successful to reflect all the beauty of intertwined strands is the length to the chest and below. Owners of short and medium haircuts do not despair, because you can use the false straps and feel like the queen of the evening at a gala reception with a hairstyle in the Greek or French style.
Hairstyles with original bindings are good because they can be used both in everyday life and at parties. Enough to add thematic accessories to impress others and emphasize the style.


 Hairstyles with original bindings are good because they can be used both in everyday life and at parties
What is needed to create hairstyles
For weaving will require:
- comb with large teeth and small ones on a long thin handle,
- rubber bands
- clamps
- hairpins and stealth,
- two mirrors for weaving control from above and behind.
Depending on the version, ribbons, hairpins and other accessories may be needed.
It is enough to distribute a small amount of mousse or foam evenly along the entire length of the strands. It will help make this comb with fine teeth. Fix weaving can be a few sprays of varnish.


Option number 1 (imitation of double weaving)
- Allocate from the top of the hairline strand with a triangular parting (base to the back of the head).
- A bunch from the base of the triangle to direct towards the bangs. Secure it with a clip.
- The remaining part is divided into 3 strands. and start braiding the way around it.
- End secure with a rubber band.
- Separate the original strand free from the clamp and, dividing it into 3 parts, weave a spikelet.
- Main spit links straightenby pulling them slightly out of the weave.
- Put in the center a thin pigtail and every 5 cm fix it to the base with pins or stealth. In order to hide the heads, you should embed them in the hair.
- Connect the tips of both braids with a rubber band and decorate it with hairby wrapping a thin bundle around fasteners.
- Sprinkle with varnish to preserve shape.


Option number 2 (volumetric braid of 4 pryadok)
- Comb your hairby pretreating out the spray.
- Collect tail on the desired site (crown, nape, side).
- Divide it into 4 equal parts. For convenience, working locks should be numbered visually.
- Etc. №3 throw on pr. №2, then redirect it under pr. No. 1.
- Etc. No. 2 is piled on pr. No. 4.
- Etc. №4 send to pr. №1 so that both beams are between pr. 2 and 3.
- Etc. №2 hold under the first and send over the third.
- Repeat algorithm to the tips of the hair.
- Fix hair with a rubber band. It is possible to add thematic accessories.
 4-strand braiding
Option number 3 (square braid chain)
- Make a high tail of all hair. Secure it with a tight elastic band.
- Divide it into three equal parts.
- Divide the middle bundle in half and pull the left bundle through the hole. Tighten the binding and connect the average loose hair bundle.
- Perform a similar manipulation with the right bundle. Tighten the strands and join the split curl.
- Repeat the action until the end of weaving.
- Secure the tips with a rubber band.
- Straighten the resulting braid and sprinkle with a small amount of varnish.


Spit using tape: what is the secret of popularity?
Despite the fact that girls and women have long known the technique of weaving various braids, this hairstyle remains quite relevant even in the modern world. It gained special popularity recently. This can be explained by the fact that weaving braids (with or without ribbon) allows you to create a romantic and light look. This hairstyle is considered to be universal, because you can safely do it for every day and for a party. The ribbon is very much loved to be woven into a bride's braid, and even office workers can dilute their usual hairstyle with such a nice accessory. If you think that a braid with a ribbon always looks the same, you are greatly mistaken, because today there are many options for this hairstyle.

What do you need to start weaving a braid with a ribbon?
What you definitely need if you want to learn how to weave a ribbon into a braid is a comfortable comb that will not tangle your strands, small rubber bands, colorful ribbons and invisible hair. That's the whole set. I am sure that in the arsenal of every girl there will be these things. If not, they can be easily purchased at any store. Today, there are so many of the most varied options and techniques for weaving braids with ribbons (photos of which can be seen below) that you can easily get lost. Therefore, before proceeding directly to the process of weaving, decide for yourself which option you like the most.
Spit with two ends of the tape
First of all, you need to make an ordinary tail, securing it with an elastic band, which you can close with a tied ribbon on top. So you immediately make the gum invisible, and create a convenient location for the tape. Remember that both its ends should be the same in length. Next, you need to divide the tail into three equal parts, while the left and right should grab the two ends of your tape. Pigtail can be woven as you usually do. Having fixed the braid at the end with a rubber band, you can hide it again with the help of a playful ribbon bow. This hairstyle looks really cute and romantic.

Three strands of braids using a single tape
If you do not know how to weave a ribbon into a braid so that it looks interesting and unusual, then try to remember how to weave a braid of four strands. In this case, the fourth strand here will be the tape. At first you might think that such a hairstyle is very complicated, but with practice it will become easier for you. Plait with a ribbon instead of the fourth strand will help to create a real work of art from an ordinary hairstyle.
French ribbon braid
The main feature of the French braid is the fact that the strands need to be weaved close to the skin, so that at the end between them you can see some geometric pattern.To learn how to make such a rather complicated hairstyle, you need to know how the French braid is woven with a ribbon (the diagram is shown a little below). As practice shows, complex hairstyles are better, if you can just follow the description. Or just ask your girlfriend to help you.

First select the place on the back of your head where your spit will start. Select here a large enough strand. To make it easier for you, you can fasten it with a rubber band, but do not forget to remove it later. Divide this strand into three parts and braid like an ordinary braid, but slightly loosening the strands. Also connect parts from the first large strand with small curls on the right side. Then you do everything the same, but you already grab a curl from the left side and so on. Before you get a French braid with a ribbon, try to learn how to make it without this accessory. Then, when you're ready, add a ribbon under the side strands on both sides. At the same time, remember that the ribbon must necessarily pass in the process of weaving from one side to the other. At the end of the pigtails, you can create a bow.
Fish Tail with Ribbon
If you do not want to strain too much, but decided to create a beautiful braid with a ribbon, then pay attention to the "fish tail" hairstyle. First, divide your hair into several rather thin locks and cross them according to a predefined pattern (it depends on how many strands you have chosen). The tape can be woven immediately in the process of creating a braid, and its free end is easy to release. You can choose a few multi-colored ribbons, then the hair will look more playful.
We weave a ribbon into a braid without elastic
If you do not want to use additional elastic, but want to understand how to weave the ribbon into a braid, then you just need to learn how to apply it to the base of the future braid so that it does not slide off later. If it is difficult for you to do this, then you can try to tie the ribbon in a knot, and only then slowly weave it into a braid. Also, these accessories can be fixed using ordinary stealth. In this case, you will need to take in the direction opposite to the future weaving, strands. A clever and interesting way is to weave the ribbon after the braid has been braided. To make it easier for you, use a needle with a wide enough eyelet or a crochet hook.

Which tape is better to choose for the spit?
Of course, if you want to understand how to weave a ribbon into a braid, but do not know which accessory is better to choose, then just follow the instructions. But if they do not relate to such a moment, then you can use absolutely any suitable tape. They can be silk or satin (the latter is most often chosen for such hairstyles). To dwell on color, think over your image to the smallest detail. Best of all, if the shade of the ribbon will be in harmony with your clothes.
3 options for creating hairstyles with braided ribbon
Long and thick hair has always been considered the property of female beauty. From them you can make dozens of different styles. Today braid is the most popular hairstyle. But a small accessory - ribbon will help to make it even more interesting and extraordinary. It is skillfully woven into a braid, which gives sophistication and charm. The elements of such sharing of the braid in the ornament of weaving were also demonstrated by our grandmothers, and this symbol wore a certain sign, indicating the girl’s readiness for marriage. Of course, such symbolism has long been a thing of the past, and today the meaning is not invested in these weaving, therefore, children's hairstyles with ribbons are also used. But an elaborate accessory in a braid adds an image of femininity and mystery.

Spit gives the image of femininity and mystery
Hairstyles with ribbons: master classes from easy to hard
Currently, hairstyles with ribbons are popular with women of all ages. This is an essential attribute of children's hairstyles. Ribbons are woven into girls' braids, they are used as an accessory for adult women’s hair, for example, to create hairstyles in Greek or retro style. Very often, turning their attention to styling with ribbons of the bride.
Our master classes and videos will teach you how to make such hairstyles yourself.
We select correctly
Currently on sale there is a large assortment of various tapes. In order not to get lost when choosing this accessory, try to adhere to the following rules:
- Satin - use in combination with classic dresses and blouses.
- Laced - more suitable for light romantic summer dresses or under the dress of the bride.
- An accessory will be appropriate for an evening dress. velvet or silk.
The color of the ribbon should fit harmoniously into the color scheme of the dress and emphasize the beauty of the hair.

Entwined tail
With the help of a normal strip of fabric, you can turn the usual tail into an original hairstyle.
Tie the usual low tail with the elastic.

Take a long ribbon. Tie it around your head. in the form of a rim. If you do a haircut with a bang, then place the bandage along the line of the bang. Tie it with one or two knots under the tail.

Remove the gum from the tail, and instead, pull off the hair with two ends of the fabric crosswiseas in the photo.

Braid thus the tail along the entire length.

Tie the end of the ribbon in a beautiful bow. Done!
How to make a beautiful bundle of ordinary tail with a ribbon shown in the video.
Another interesting combination of tail and ribbons.
Spit - flower
Very interesting and unusual hairstyle. The ribbon woven into the braid makes it especially elegant and bright.
Split hair side partingas in the photo. To the left of the parting, tie a small ribbon folded in two to a small curl.
For weaving chetyrehpryadnoy braids take three strands of hair. The role of the fourth strand will be performed by the fabric (it should be the third in a row).
Perform weaving according to the following scheme: put the first strand on the third, passing it under the second. Fourth, put on the first, passing under the third. Add a small amount of hair to the extreme strands each time.
Bringing weaving to the middle of the head, tie a braid with a rubber band.

Similarly, braid a four-strand braid with a ribbon, on the right side. Weave perform diagonally. Pull the edges of the braid to create an openwork effect.
Come back to the first spit. Finish it to the end, and also stretch slightly along the edges of the curl. Lay the first braid in the shape of a flower and secure with studs.

Video will help you learn how to weave a four-strand braid of two strands and two ends of a tape.
Spit - zigzag
This original hairstyle with a ribbon, matched to the color of the eyes or dress, confidently holds hair and looks great on both little girls and adult girls.
The tape for this styling should be smooth, slippery, silk or satin. Its length should be twice the length of the hair, the width should not be very large (about 1 cm).

Comb the head of hair back. On the left side of the head, separate the small strand, flip it to the side of the face. Have the root of the hair tie a ribbon.

Take the previously laid strand. Divide it into three parts. Of these, and the tape will be a braid. Satin or silk will replace the third strand. Weaving begins on the left strand. It is transferred to the third position, passing over the second strand, and under the ribbon.

Now the right strand is skipped under the one that has become the third over the fabric.

In the following steps, weaving is performed in the same technique, but with the addition of small additional curls, as shown in the photo.

Strands need to try to weave smoothly and gently. To make a turn 2-3 times, do not interweave the strands on the left side, and then take a curl a little to the left of the braid angle, as in the photo.

Braid a section of the spit from right to left, and also make a turn.

Now you need to calculate the weaving in such a way that the strand is enough to the middle of the head. Continue to the end of the hair. Secure the result with a rubber band.

Spin the free part of the braid in a few little rings and pin to the head with pins.

If weaving a four-strand braid is new to you, use the training video.
Winding Spit
This is a very spectacular hairstyle that makes the girl unusually graceful and sophisticated. The choice of tape for her is not limited.

Prepare a satin ribbon 1 cm wide and twice the length of curls, silicone gum and hairspray for styling.
Carefully comb through the entire length. Separate the hair strand from the bang line (it will be woven first), and fasten the tape on the curl under it with a clip.

Make a full turn of the ribbon around the strand, as shown in the photo. Start and finish turnover should on the outside.

Repeat the procedure for turning around the second, left-handed strand.

Pick up the ribbon and strands and tighten them by pulling the knot. The number of waves in the curl can be arbitrary. In the photo, the girl has a not very thick hair, so four waves are used.

The last strand of the wave begins to form a curl in the opposite direction. Give it a half ring shape and tie it using the same technology.

The following strands come in alternately with the addition of a loose hair undercover.

The third and subsequent cascades are performed similarly.
It is important to remember that at each new stage, the last order of the previous one becomes the first, and is woven without additional pallets.

The end of the braid is fastened together with a tape with a silicone rubber band.

See how the master performs this hairstyle on video.
Do not worry if not all hairstyles with ribbons will work out perfectly for you the first time. Some of them will require practicing weaving skills. But, having a little practice, you will replenish the collection of your styling with interesting and unusual options.
How to braid beautiful and original braids on medium hair for girls (38 photos)
Long since the braids and braids allowed to create beautiful hairstyles, giving girls femininity, adult women - elegance, and little girls - charming princess. A variety of braided hairstyles remain popular today, when, thanks to information technologies, various weaving options adopted in various countries have become known in our latitudes.

In the photo: pigtails on the head of a little girl
We decided to tell you how to braid charming braids on the head of a little girl with curls of medium length. We are confident that our detailed instructions will be useful to you, and you and your daughter will be with great pleasure creating beautiful and attractive hairstyles.
Fundamental rules
Before telling you how to create beautiful pigtails for medium hair for girls, we focus on the basic rules.
In particular, the smaller your daughter is, the simpler the hairstyle being created on her head should be - after all, it is unlikely that a child who barely turned three or even four years old can sit quietly for at least half an hour, not to mention an hour in a chair near the mirror .
Note. When weaving small girls on the head, it is not recommended to use non-wrapped silicone elastic bands. They can damage the hair and cause the child pain and discomfort.

The rules for creating hairstyles are extremely simple.
In addition, keep in mind that small children have not yet fully formed a hair, and hair:
- thin,
- rare,
- the weak.
Therefore, not all weaving options will look perfectly beautiful. As a result, you will be disappointed in your abilities and you will upset the child, because he will get absolutely the wrong hairstyle you dreamed of.
Spit Malvina
If your child's curls are not too grown and are in the stage closer to short than average, then this option will be optimal.
He suggests the following actions:
- separate in the temporal area by a small strand,
- braid pigtails on each side,
- they should be pretty tight
- take them to the back of the head,
- connect
- secure with gum,
- if the length of the braids allows, braid them into one.
The result will be Malvina’s beautiful, sweet braid.
Making braids for a girl with medium hair, try this method, which involves:
- weaving several braids
- making them on the head in the form of a flower.

In the photo: hair "flower" of braids
To create this hairstyle should:
- split hair
- Parting can be both direct and oblique,
- braid two small braids on each temporal region,
- slightly stretch the strands,
- so your weaving will be openwork,
- roll braids into spirals
- you should have a flower
- fix spirals with beautiful studs, preferably with beads - these are the beads that will form the middle of a flower.
Note. Buy a variety of accessories for weaving today is not a problem. They are sold in cosmetic stores and even in the subway. The price of such products depends on the type of material and the final quality, but in any case it is not high.
Charming fountain
This option is suitable for those babies whose bangs are cut straight.
To create your own hairstyle you need:
- define the parting created by the bang,
- a couple centimeters away from him
- collect strands of five tails,
- fix the bases of the tails with rubbers,
- alternately braid tails in tight braids, not forgetting to pre-remove the gum,
- after weaving fix the tips with the same rubber bands.
As a result, the curls in the occipital zone will remain completely free, but in front, sitting a little behind the bangs, you will get several braids that will not allow the hair to cover your face.
Ribbon Option
This option is suitable for those girls whose hair is not quite medium length yet, but closer to short ones. Of course, such strands do not allow to make beautiful braids, but what if the baby wants them?

Sample spit with ribbons
It's simple - use tape or ribbons.
In particular, it is perfect:
Fold the selected ribbon in half, and tie the bend around the base of the selected strand, then from this strand and the two ends of the ribbon, braid a regular braid. So you can create several small braids at once.
French weaving
The so-called French weaving allows you to create unusual pigtails, and therefore there is nothing surprising in the fact that it is becoming increasingly popular.

An example of French weaving
If the length of the hair reaches the shoulders, then in this case you can easily create a hairstyle called “Wings”:
- hair in the forehead zone combed back,
- the tail is formed from them and fixed by an elastic band,
- starting from the right temple you need to start weaving an ordinary French braid,
- it is necessary to gradually weave thin strands into it, attaching them from the right half of the tail,
- do the same on the left side,
- as a result, you will have two weaves formed,
- They must be joined together through a hairpin.

In the photo: another example of a little girl's hair
Braid of bangs
If the hair is still growing and has not reached the average length, follow the weave:
- divide the hair with the usual side parting,
- weave a braid on the French technique, starting from the right ear, gradually weaving into it separate strands from the side of the forehead along the entire line of curls,
- if the length allows, weaving can be finished directly at the left ear or continue along the occipital region, but in this case already weaving the crown strands into the braid.

In the photo: an example of a scythe called dragon
Triple braid
Another great method to create a beautiful and charming braid.
The essence of creating hairstyles is as follows:
- the hair should be divided into three beams at once,
- one of them should be located below the right ear,
- the second will be located exactly in the middle of the occipital region,
- the third is above the left ear,
- each bundle must be collected in the tail and secure with rubber bands, placing them at the base,
- release the lowermost tail and create a French braid from it, which will be located in the direction from the right temple to the occipital region,
- also do with the remaining tails,
- Fix the tips of the braids with a barrette, placing it directly at the left ear.

In the photo: an example of a triple braid
As you can see, there is nothing difficult in such a hairstyle, despite its name - the main thing is a little patience with you and your child, and everything will be guaranteed.
In conclusion
We told you about several braid weaving techniques for small girls with medium-length curls. Each method is somewhat original, allowing you to create an amazing image for your little princess. We recommend trying all the methods in order to understand exactly which braid is the best for the girl.
Additional video in this article will help to better understand all the methods of weaving, as well as get new useful information on this topic.
Weaving a child: a braid of three strands with a ribbon
 Hairstyles for little girls 2 3 y
 Fishtail hairstyle
 Cristiano Ronaldo hairstyle
 Hairstyles for thick hair of medium length
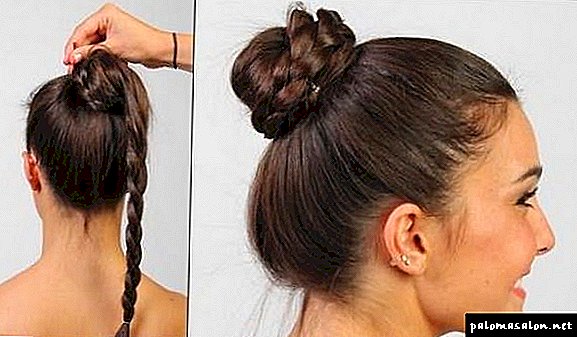 How to make a cool haircut
 Hairstyle swedish boy
 Beautiful evening hairstyles for long hair
 Fashionable hairstyles for free
 Hairstyles for dirty hair
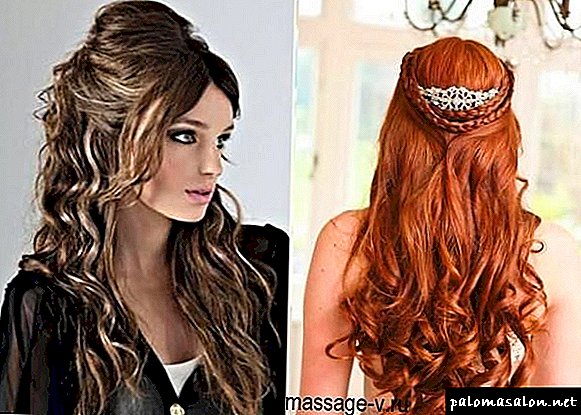 Hairstyles with curls on medium hair
 Hairstyles for short hair with a diadem
 Wedding hairstyles with flowers for medium hair